A Guide to Contributing to an Open Source Projects
Start contributing something to an Open Source Project/Software that you found
5 min read
What is Open Source?
From Wikipedia, this is what we get about Open Source:
Open-source software (OSS) is computer software that is released under a license in which the copyright holder grants users the rights to use, study, change, and distribute the software and its source code to anyone and for any purpose.
In simpler terms, it means that the software’s underlying code is made accessible to the public, and anyone is allowed to view, modify, and share it.
Why contribute to Open Source?
By contributing to the project, we can help the community who made it and so many peoples who used the project, and your contribution history can be a valuable addition to their portfolio. We can even contribute some simple things such as typos, grammatical errors, or docs addition, so not every contribution should be a code change.
Pre-requisite
You only need to know about the basic of git such as cloning, push, and pull. And already have a GitHub or another git platform account.
Finding the project to contribute
Selecting a project that aligns with your interests and expertise is essential. Look for projects that you use or find interesting. To explore different projects, you can browse them on popular platforms like GitHub, GitLab, and Bitbucket.
Example
Recently I am on learning and exploring Jotai state management at tutorial.jotai.org (an Official interactive Jotai tutorials website) and found something wrong with the sentences, so here I will use this as an example to contribute because it was open source too.

I captured this from tutorial.jotai.org/quick-start/theme-setting which is one of the pages on the website, something’s wrong, right? Yeah, there are some grammatical errors, especially the “for you app” sentence, this is what I want to fix, so let’s just get started.
FYI: Jotai is one of the popular state management libraries for React app.
Get in touch with the project source
So, after finding the project that would we contribute to, let’s open the source of the project. For this case, it is github.com/jotaijs/jotai-tutorial.
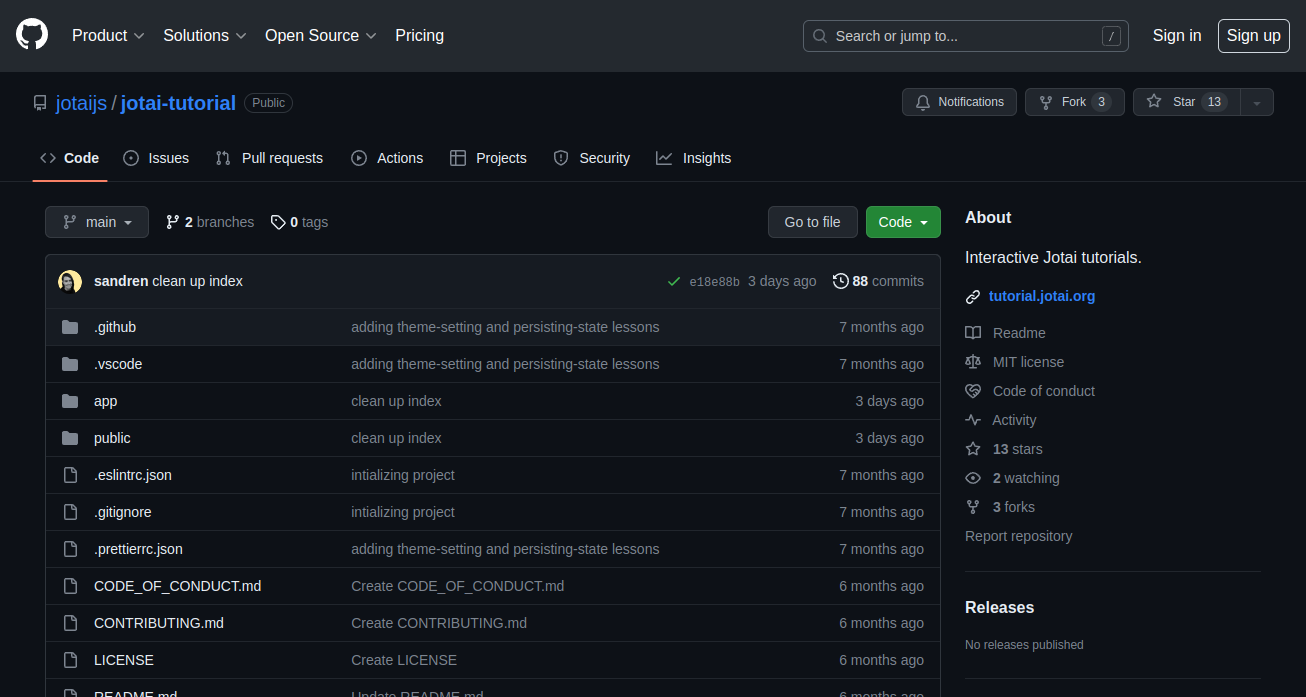
It is a Next.js project, if you don’t know about Next.js it doesn’t matter, because it is only for example.
Know what to change
Make sure we know what we will change through the project codebase. In my case, it is in ~/app/quick-start/theme-setting/markdown.ts.

Yup, that is the code that shows the grammatical errors.
Contribution guidelines
Getting to know about project contribution guidelines is one of the important parts. We should read and understand the contribution guidelines of the open source project we want to contribute to which is usually listed in the file CONTRIBUTING.md. Here is an example:
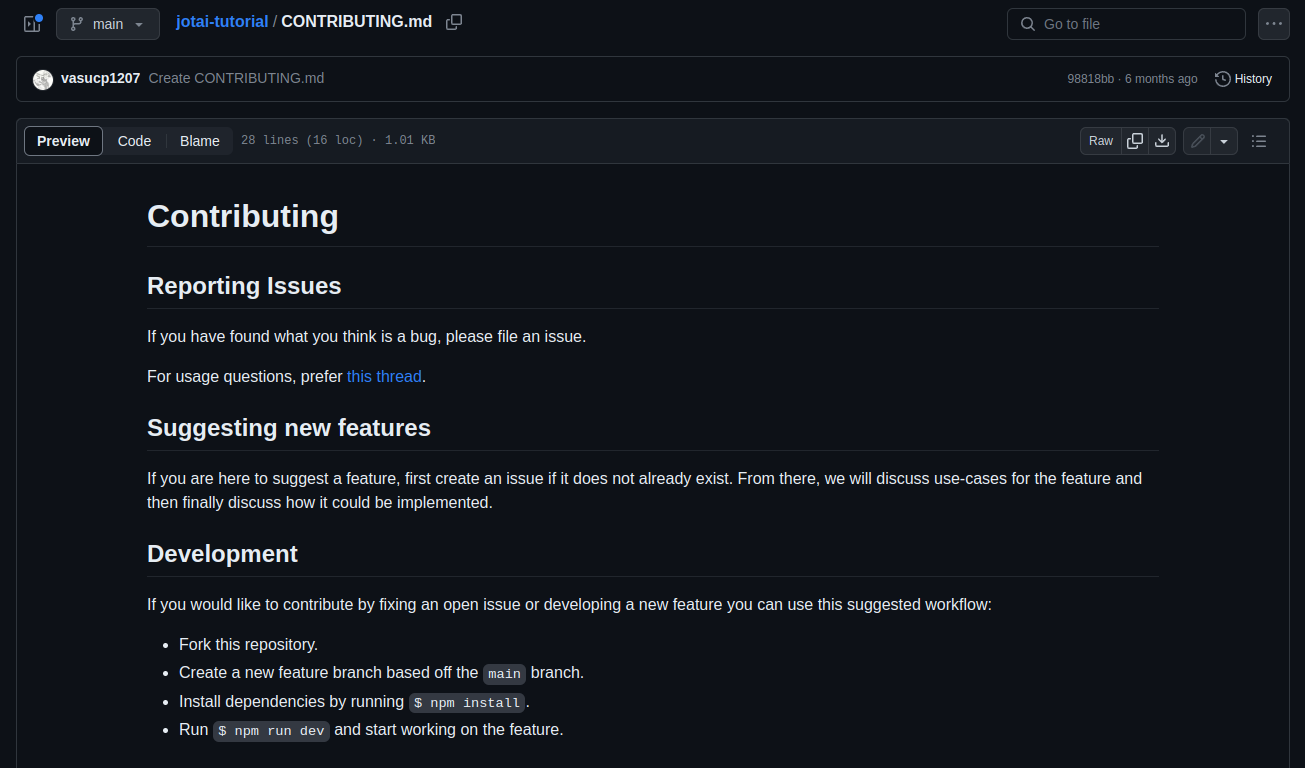
The file usually contains “How to contribute”, “Code of Conduct”, “Branching and Versioning”, and “Coding Standards and Style Guidelines”.
Start to make a changes
I will use GitHub because the project that I am exemplifying is on GitHub. So if the project you are going to contribute is on another platform like GitLab or Bitbucket, that’s fine.
Fork the repository
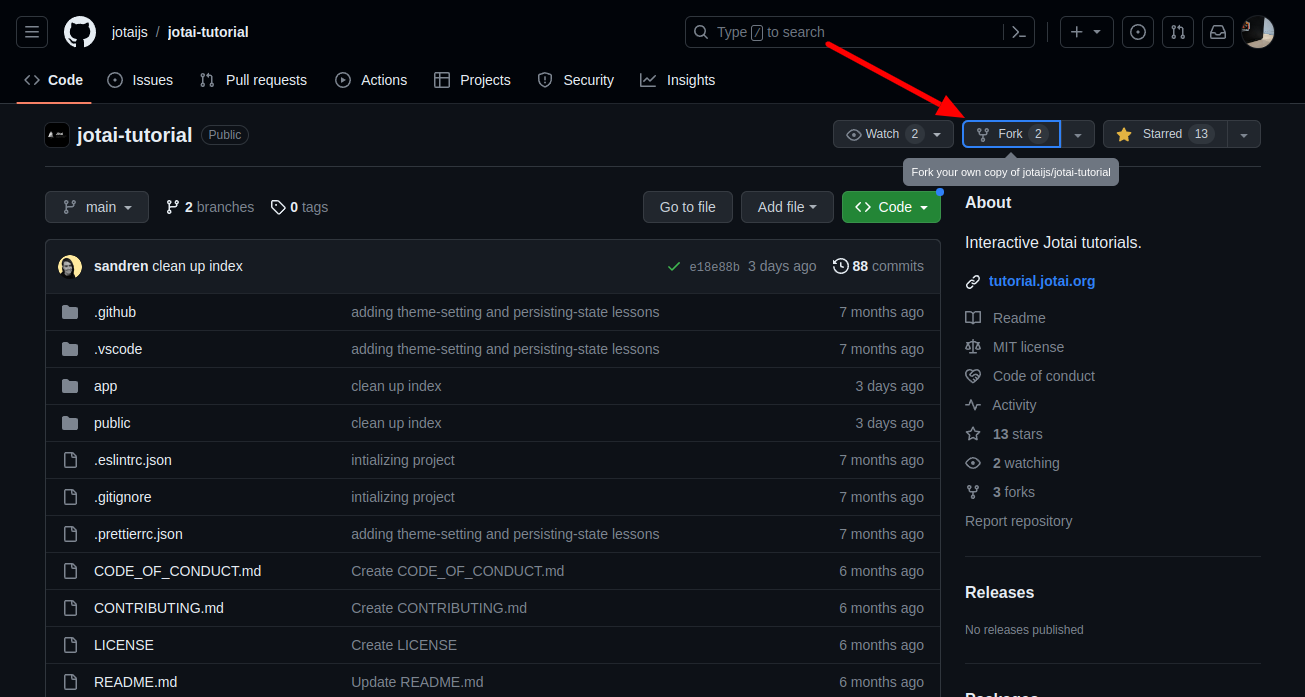
On the project repository page, click the “Fork” button.
In this step, we can create a new name or description of the repository. But I will change nothing, so in this step, I will immediately click the “Create fork” button.
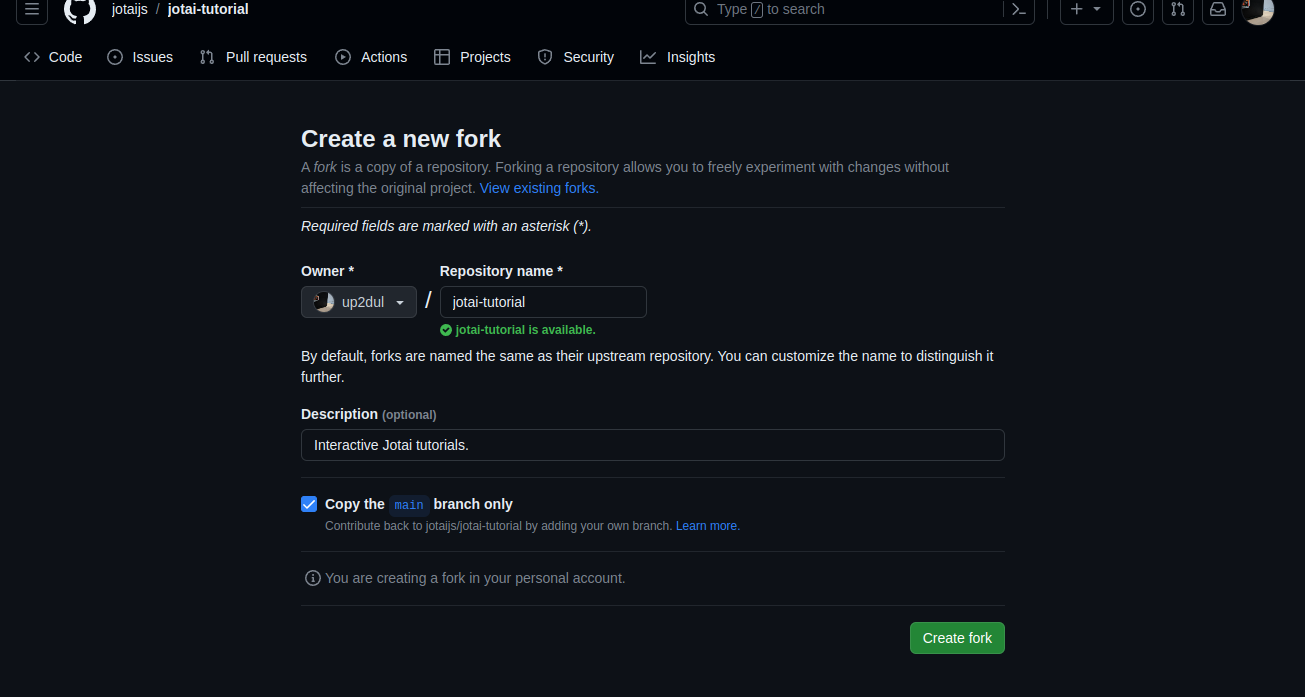
So here is my repository that forked from github.com/jotaijs/jotai-tutorial.
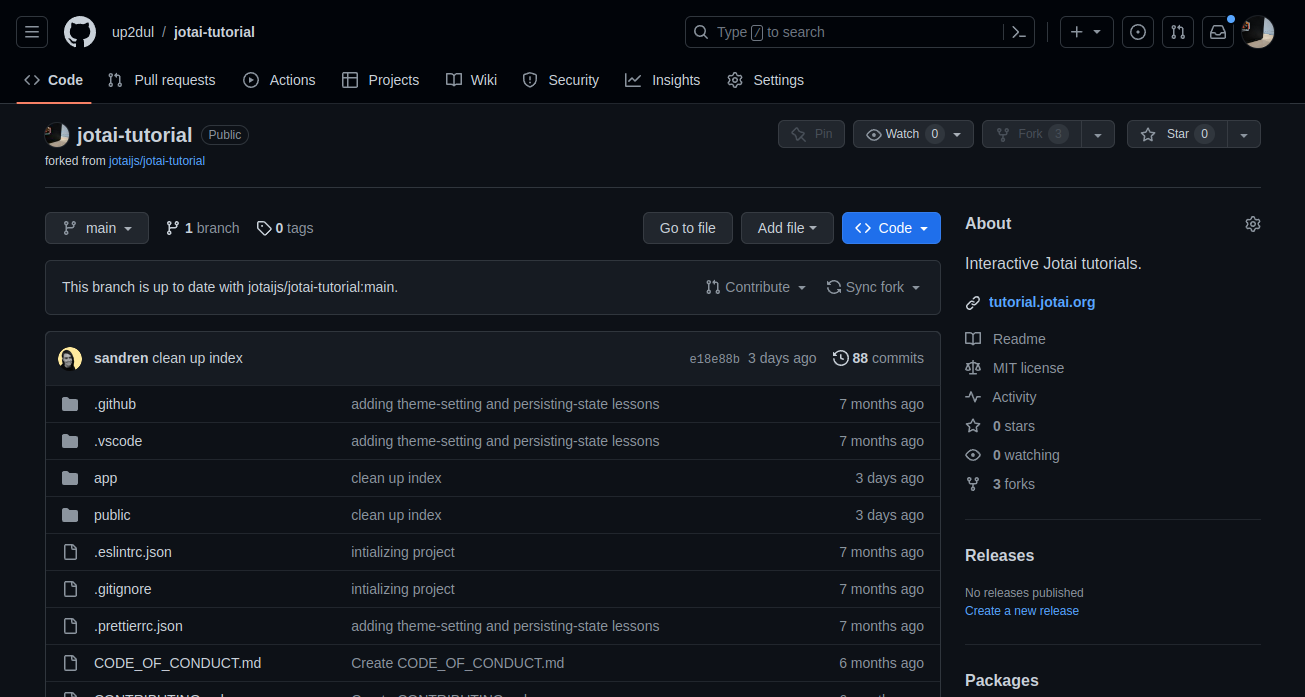
Clone the forked repository
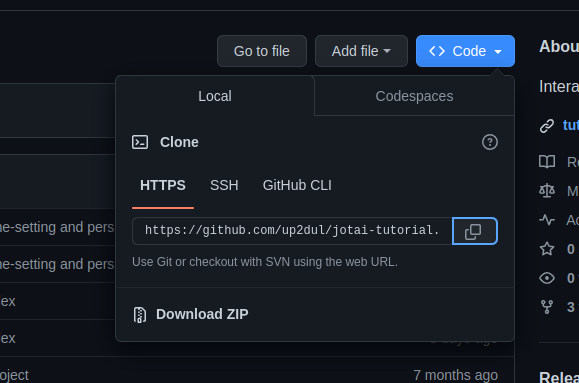
Now on the forked repository clone the git repository to local. Copy the git URL.
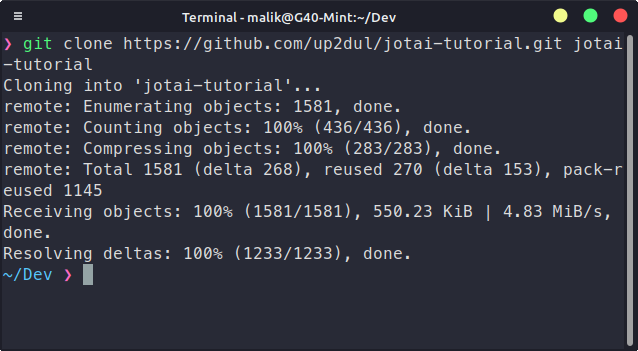
Open the local directory for the project to the terminal, run git clone <GIT_URL> <PROJECT_FOLDER_NAME>, in here I pass the folder name to “jotai-tutorial”.
And then open the project using code editor, I will use Visual Studio Code.
Make a changes
Because we already know what would we change, so just make the changes now using code editor.

Those are the changes I have been working on. Left (before) and right (after).
Push the changes
After we make the changes now create a new branch. Why did we create a new branch instead of using the main (main) branch? it’s keeping the main branch clean. So in this case, I will create a new branch named fix/theme-switcher-grammar by running this command:
git checkout -b fix/theme-switcher-grammarBy running the command, we also automatically moved to the new branch. Then now I will commit the changes. Then add the changes to the staging and commit.
git add .
git commit -m "fix: grammatical errors in theme switcher page instructions"
And now push the new branch with changes to the fork on GitHub.
git push origin fix/theme-switcher-grammarFor the branch name and commit message, make sure we provide clear naming/message and related to what we change.
Back to the GitHub
Then if we back to the forked repository, there is will appear a notification like this with the button “Compare & pull request”, and now let’s click the button because we want to make a pull request.

Then we will get directed to the pull request page, we can fill the pull request title and description well. Make sure we fill in the title according to the context of the changes we make. In my case, I fill the title “Fix grammatical errors in theme switcher page instructions”, and would be better if we provide the screenshots for the changes we make. If it’s done, then we click the “Create pull request” button.
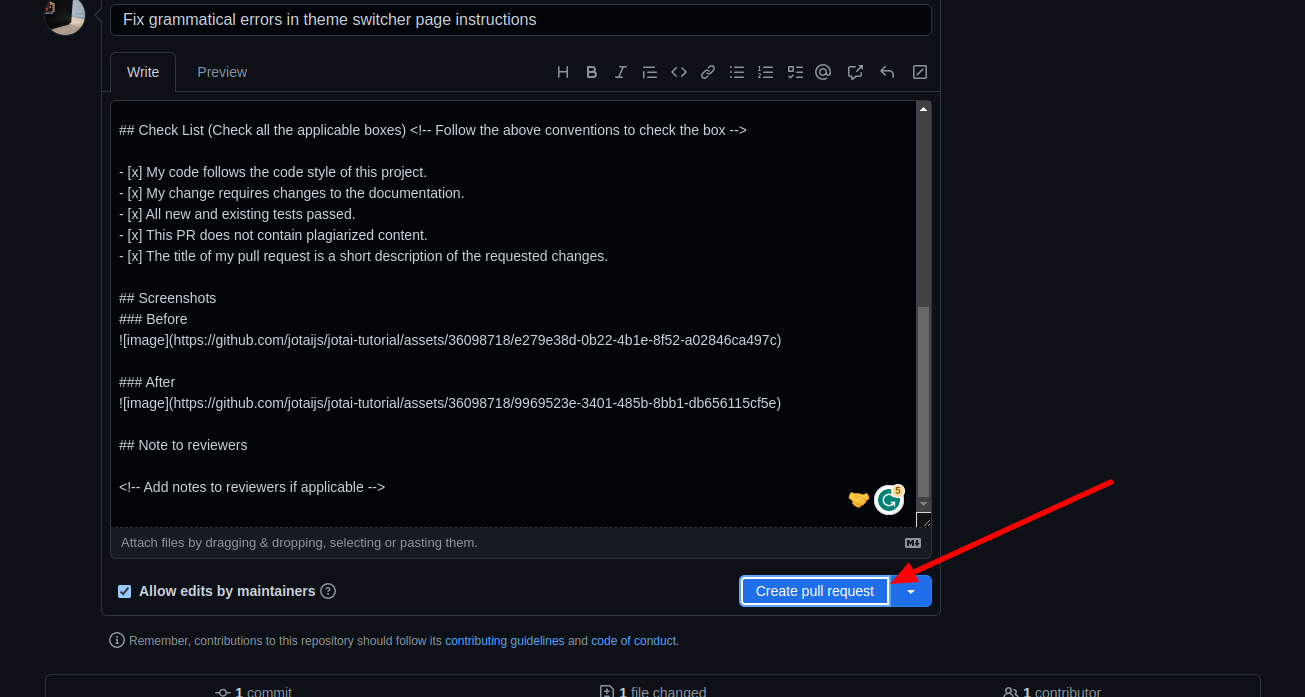
And done.
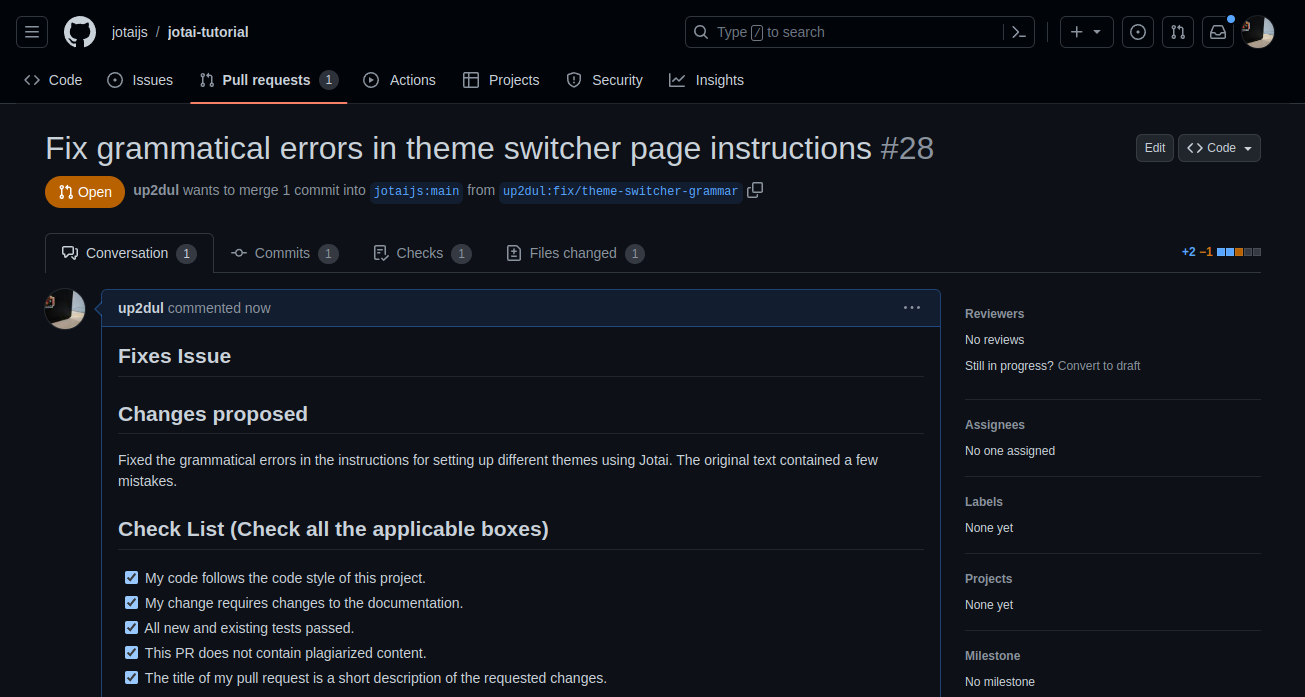
Now we need to wait for the review from the project maintainer, if it is approved it will be merged by them, otherwise, if there are still errors or something wrong then usually they will comment and tell us to improve the changes we made.
Conclusion
Contributing to open source projects is one of the ways that allows we to make a positive impact on the software community. By choosing the right project, engaging with the community, and submitting meaningful contributions, we can become an active part of the open source movement and advance our coding skills to new heights.